Showing posts with label christmas crafts. Show all posts

How to Make Paper Snowflakes


Ah, paper snowflakes, a perennial favorite and yet...one of those things it's so easy to forget how to do!  No worries, I've got you covered with this super simple infographic.  I like using old magazine pages to make my snowflakes, it's a great way to upcycle and the text gives the snowflakes some lovely texture.  Just click on the image to enlarge, download the infographic and you'll be on your way to a blizzard of paper magic.  

DIY Snow Globes or How Ideas Happen


I was so pleased with myself after designing my tiny snow globe necklace.  I've been making jewelry with these tiny glass vials for years.  Still, I'd never done this before and I thought it would be a quick and easy craft for virtually anyone to recreate.  It took me a while to figure out how to get the tree tiny enough to fit inside of the vial...yet someone else had the same idea and same solution.  Derp.  So much for my "original" idea!

Snow Globe Necklace for iLoveToCreate

I'm guest posting on the iLoveToCreate blog today with a miniature DIY Snow Globe Necklace!  I love these little glass vials, I've made jewelry with these before, but I think this one is my favorite.  What's more fun than wearing a snow globe?

DIY Glittered Ornaments for iLoveToCreate

As you can see, I'm having a little love affair with clear glass ornaments this year.  It actually started last year with some vibrant feather filled ornaments, but something about this blank canvas keeps me coming up with more ideas.  This time, it's all about glitter.  Mmmm...glitter.  You can get the step by step instructions to make these DIY Glittered Ornaments on the iLoveToCreate blog today.

Cheap and Easy (Crafts): DIY Embellished Holiday Letters for iLoveToCreate and Book Trailer!


Yup, it's time for another Cheap and Easy (craft)!  I'm guest posting over at iLoveToCreate today and if you follow the link you can get the 411 on how I turned these FOOT TALL paper mache letters into sparkling holiday accents in a flash!  You may recognize these from our Consumer Crafts Haul Video.  Hooray!  Speaking of videos, my talented and endlessly patient hubby Drew just finished editing a fabulous trailer for the new book!  Check it out, it's only a little over one minute long and the intro he made is ADORABLE!


Do you have your copy of The Fine Art of Shameless Self Promotion yet?  You're gonna like it, I just know you will!  It's the perfect way to kick start your new year!

xoxo
Madge

Cheap and Easy Crafts: Silvered and Glittered Holiday Thrift Store Frames


YAY!  It's time for cheap and easy (crafts!) with a silvered and glittered frame DIY! This one is silly easy, you can do this with any plastic or wooden frame that has nooks and crannies and gold base paint.  Or start with raw wood for a pickled effect.  The images come from my personal ephemera collection...but you can get some of your own on my website!  Yes, I have packs of vintage Christmas cards for your crafty creations

I am guest blogging for iLoveToCreate today, so you can find the instructions to make your own silvered and glittered holiday thrift store frames next door.  It's so easy, you're going to be scouring your local thrift stores and flea markets for dreadful frames to repurpose!

Did you get your copy of my new book yet?  Here's what Shannon Ownby of Fabrics 'n Quilts has to say, This is awesome! Your writing style even makes homework fun!

What better way to kick start your new year than with a glittery kick in the ass and a clear cut plan of attack, you know, after the champagne and kisses!

xoxo Madge

How To Make Pretty Papers DIY Christmas Cards


These Pretty Papers DIY Christmas Cards are a breeze to make using cardstock, scrapbook papers and crafty bits and pieces!  I'm guest posting on the iLoveToCreate Blog today and you can get the instructions to make your own Pretty Papers DIY Christmas Cards there tout de suite.  Mais, oui!

I am kinda proud of myself for finally figuring out how to make a transparent layer in Photoshop.  Oh, I could have used the manual, but it hurts my head.  So instead, I have stubbornly stumbled around like an idiot for months now.  But let's face it, the internet is changing fast and galdangy there are a ton of bloggers who are super graphics savvy and Madge was falling behind the times.  My horse drawn cart was limping along while bullet trains sped past.  I will not go gently into that good night though, so I persevered.  I'm happy with all of the pictures I made for this tutorial, really more like tickled silly.  So heck, go see my Pretty Papers DIY Christmas Cards and check out my fancy little graphics too!


I am afraid, much like when I went from a manual typewriter to a computer (way back when the pages printed out with perforated edges)...I may go overboard with my fancy new tricks for a bit.  And you may feel much like my professors who were happy to see me leave White-Out behind, but equally annoyed at my new found love of FONTS!  Give me an F!  Give me an O!  Give me an N!  Give me a T!  Give me an S!

FONTS!

And here I am lo these many years later still geeking out over fonts.  

Ah well.  On another note, it's beginning to look a lot like Christmas...well, not so much at Casa de Potter...but SOON!

Have you gotten your copy of my new book yet?  I won't stop nagging you until you do!

xoxo
Madge

How to Make Paper Snowflakes Guest Blogging for iLoveToCreate!


I had completely forgotten how to make paper snowflakes, but I had this idea for some upcycled magazine embellished gift bags and I decided to give myself a refresher course.  I am guest posting over at the iLoveToCreate blog today and you can get the tutorial to make the snowflakes and the bags!  I'll be sharing this project on an upcoming episode of DIY on the FLY for WBIR Live at Five at Four here in Knoxville too!

There will be a blizzard of paper snowflakes before I'm finished! 
Meanwhile, back in the studio...every ding of my cell phone is another book sold!  We give a "WOOT!" each time where hear that sound here at Casa de Potter!  It's the most amazing feeling to go from idea to finished concept and to have people buy it!  WOOT! Even better news, so far people are loving the book.  I'm getting lots of rave reviews.  Check out this review from the divine Miss Jean Yates!  We're only offering the introductory price until the end of this week, so if you're thinking about getting the book, now is the time!

Craft Wars Inspired: Holiday Sweater Rose Wreath


True Craft Confession: I was pleased as wassail punch with my wreath from last week's episode of Craft Wars!  My tree...well...had some obvious issues, but the wreath was something I'd happily hang in my home.  Yes, there were a few glue strings and boogers, but I don't usually craft at the speed of light.  Glue strings and boogers are fairly easy to avoid or remove when you have the luxury of time. 

With the aforementioned luxury of time on my side, I present my prettier, lump, glue string and booger free, new and improved upcycled sweater wreath for your craftertainment!

Insert holiday trumpet flourish...here.

I love the idea of turning ugly old thrift store sweaters into a fabulous new wreath.  I scored the grey and a black and white striped wool blend sweaters at my Goodwill for $.25 each!  Cha-ching! I actually scored a third black and grey striped sweater, but my daughter snapped that puppy right up as a night shirt.  Bonus!

Without further pomp and circumstance, here's how you can make your own upcycled Craft Wars Inspired Sweater Rose Wreath.  Oh and check out the links at the end of my post to see what the other Craftacular Craft Wars Vets created inspired by last week's episode! 

Instead of using sweater arms for the base like I did on the show, I wrapped off-white yarn around a round wreath form.  I used a saw to cut the wreath in half which made it easier to wrap. To put it back together, some 16 gauge craft wire with Aleene's Foamtastic glue did the trick.


This red pom-pom yarn was recently on clearance at my local Michaels, and it gave a fun, whimsical, candy cane look that I'm totally digging!  Just wrap it around the reassembled wreath working about 1" apart.

You can use the Clover pom-pom maker to make fuzzy yarn pom-pom accents.  I made two, because I loves me some pom-poms, oh yes I do!


Use old sweaters, or get some at Goodwill like I did!  Cut the sweaters into triangular strips and rolled into roses.  Vary the lengths and widths.  A 2' length is a good starting point.

Cut two contrasting leaves as accents.  Hot glue the flowers and leaves into a solid shape and attach that to the lower left side of the wreath.  (Note: If you are using a sweater that might fray, try Aleene's Stop Fraying around the edges.)

Attach the pom-poms on top and bottom of the roses with hot glue.  Aleene's Super Thick Tacky Glue makes quick work of adding button and rhinestone accents.  It dries clear without boogers or strings, huzzah!


Traci Remley turns some old sheet music and cupcake wrappers into a charming vintage inspired wreath.
Nikki McGonigal shows you how to make wine twice as fun with her all season cork wreath!
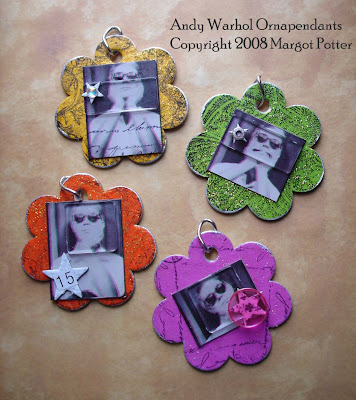
Lisa Fulmer makes an a dor a ble ornament inspired by the vibrant colors on my holiday tree from the show!
Cheryl Burchett shares a divine postage themed baby announcement for her latest creation, her son Joshua!
Pattye Duffner repurposes some baby blocks as festive ornaments!
Angela Daniels soothes her 'guilt' with a Thank You card wreath!
Andrea Currie turns a truly awful sweater into a truly lovely year round wreath!

Tune into TLC this Tuesday at 8pm EST for a new episode of Craft Wars!  Join us on Twitter at #craftwars for live show tweets!  After the show, Stephen Brown and Nikki McGonigal host a fun show wrap up on Spreecast!

The Twelve Crafts of Christmas! iLoveToCreate Teen Crafts: Super Cute Santa Mini Canvas

Super Cute Santa Mini Canvas Copyright  Avalon Potter

(Mom here: Ho ho ho!  It's day two of the 12 Crafts of Christmas at The Impatient Crafter blog!  Huzzah!  Miss Avalon made an adorable retrofabulous mini-canvas using a permission free Dover clip art image and some collage elements including an acrylic letter, rubber star stamp and a wooden snowflake.  It's all put together with Aleene's Tacky Glue and made sparkly with Traci Bautista's Sparkles Collage Pauge.  Love, love, love that stuff.  I made my own version with a Victorian era postcard image from my ephemera collection, a vintage bottle cap, some new vintage themed collage elements, stacked stars and a sprig of tinsel.  These are so incredibly fun to make...we got the canvases with coordinating easels at Michael's.  You could glue the canvas to the easel, add some wire and make some super cute artist ornaments!)

Super Cute Santa
Avalon Potter for iLoveToCreate
Teen Crafted, Mom Approved

Recently I was out shopping with my mom when I stumbled upon these miniature easels and canvases. I immediately knew that I had to use them for a project because they were so cute. So I bought two, one for me and one for my mom. Since Christmas is right around the corner I added Santa , a snowflake, and the rest is history. I hope you enjoy it!


Materials
Mini canvas and easel
Permission free sized image (Mine is from Dover Books Holiday Clip Art)
Acrylic letter
Wooden snowflake
Tiny star stamp
Traci Bautista's Collage Pauge
Aleene's Quick Dry Tacky Glue
Scribbles 3D Paint Pens Primary Colors (red)

Tools
Computer with publishing software
Printer
Scissors
Foam brush

Instructions
1. Select a bold image, size to fit canvas on a computer and print.

2. Cut image out with scissors.

3. Take your decoupage medium and paint it on the back of your Santa using foam brush. Put the Santa on the canvas and apply more decoupage medium, on top and all over the canvas. Let dry.

4.While that dries paint your snowflake red. Let dry.

5.Take your letter and attach to the bottom right of your canvas. Apply glue to the back of your snowflake and attach to the top left of your canvas.


6.Use your red paint and little star stamp to stamp the top right and bottom left of your canvas.

7.Enjoy!

Victorian Mini Canvas Copyright Margot Potter 
(So many sparkles, I couldn't get a clear pic!  Go Sparkles Pauge!)

Retrofabulous Christmas Craftabration: Suzy Snowflake Snowlady

Here comes Suzy Snowflake...

Suzy Snowflake Copyright 2011 Margot Potter
Snow Couple Copyright 1966 Better Homes and Gardens Christmas Ideas

Better Homes and Gardens Christmas Ideas Magazine Cover Copyright 1966

This is perhaps one of my favorite projects...ever. I spent three full days carefully working on this, waiting patiently for the layer upon layers of material to dry. There was one craftastrophic moment with her nose, which I fixed with a few new layers of faux snow and a bead...PHEW! She is a little kitschy crafterpiece inspired by a project in a 1966 Better Homes and Gardens Christmas Ideas magazine and I am completely smitten. She was a labor of love. Not for a book or a magazine or a manufacturer, but just for the love of making. I know, she's funky, she's weird...she's...well...totally Madge.

Suzy Snowflake Copyright 2011 Margot Potter

Suzy Snowflake Close Up Copyright 2011 Margot Potter

I used a variety of materials including a generous sprinkling of SWAROVSKI ELEMENTS (check out her tiny jewelries and her arms), fabric flowers, Aleene's Glitter Snow, Aleene's Quick Dry Tacky Glue, pink and snowflake sequins, tinsel ball chain ribbon, pink bubble and glitter organza ribbon, head pins and eye pins, Aleene's Fabric Fusion tape, 20 gauge Beadalon German style wire...and Stickles glitter glue in Stardust from Ranger. I used Sharpee pens to color in her facial features.  I scored these peppermint beads a few years back at my friend Stan's shop. I don't know if he has any left, but his url is www.greatcraftworks.com. I got the mini-flocked trees on close out a few years ago, just added glitter, sequins, ball chain and a peppermint bead tree topper.  If you make something similar, be sure to use steel or hard tension armatures, she needs stability, regular craft wire will not work.  There is an armiture wiring her body together and a second armiture wiring her to the styrofoam stand. She needs to be free from the stand during the embellishment process.When you glue headpins with embellishments into her or the stand, make sure you dab some Tacky Glue on the stem of the headpin. This keeps them from working themselves back out over time.

Suzy Snowflake Copyright Margot Potter 2011

A crafty angel donated a HUGE plethora of vintage craft magazines to Studio Madge this weekend. There is so much inspiration inside my head is spinning! Huge thanks to Erin Holloway (and Ms. Phylma.) You are at least seventeen different kinds of awesome! (Check out Erin's tatting work, a ma zing!)

Stay tuned for more Retrofabulosity from Studio Madge for the Holidaze and beyond! And if you've not heard this lovely holiday song yet, below is a YouTube video with the incomparable Rosemary Clooney singing Suzy Snowflake. Divine.

Cheers,
Madge

Retrofabulous Frosty the Floam Man!

Frosty the Floam Man Copyright 2009 Margot Potter ALL RIGHTS RESERVED

I created this rather large and somewhat lumpy snowman for an appearance on QVC several years ago. I was selling the mysterious substance known as Floam and had to whip up some samples to show folks what to do with it. I have to admit, it's a rather fun medium! It's particularly suited to Styrofoam, but you have to work with it to get it to stick.

Floam has the dubious distinction of being 'possibly the most hated toy ever'. It may be a dreadful toy, but it's a truly fun craft medium. If you search, you can find recipes to create your own, or you can dig around and find some to buy pre-made.

This is the most popular project on my blog right now and I can see why. It's got a shabby, country, folk art friendly appeal. Alas the original Frosty the Floam Man has probably been dumped into a landfill somewhere and I am fresh out of floam, enthusiasm and giant Styrofoam balls to recreate him. Still I can print him out as a lovely photograph and sigh wistfully and you can follow this link to get the instructions to make a Frosty of your own! Huzzah!

Sigh.

Tune in for more Retrofabulosity to come!

xoxo
Madge

Retrofabulous Christmas Craftabration: Dollar Store Christmas Stocking

Retrofabulous Dollar Store Stocking Copyright 2010 Margot Potter

This is a tricked out dollar store stocking I created last year using yet another scanned vintage postcard image from my Victorian postcard stash. The postcard was really beat up, but a little work in Photoshop and a quick resize and it looks simply fabu! (Do not be afraid to get the 'crafter's lot' of vintage post cards on eBay, there are diamonds in the rough lurking there!) I printed it on a sticky back canvas sheet and adhered it to the stocking adding a smattering of various and sundry gee gaws and doo dads I had around the studio. A few judiciously placed glitter accents...and...it was ready to go to the local VA Hospital and hopefully cheer up a vet for the holidays.

I like clean and simple design, a few too many gee gaws or doo dads and you've lost me. It seems hard to believe, I know, that someone so over the top likes simplicity, but it is true. I believe it was Coco Chanel who advised that before you leave the house you remove one accessory. Yes, well, same with crafts. Less is more. Well, more can be more too, but it all has to make sense and have synergy. It's hard sometimes to see things objectively when you've been staring at them for a while, but try taking away one thing and see if it doesn't bring it all to life.

Or perhaps, if you're afraid of gee gaws and doo dads, add one more. All things in moderation, including moderation.

Either way, a dollar store stocking can look quite rich with just the right combination of gee gaws and doo dads. That is all I am trying to say. Perhaps an editor is in order?!

Doo dad, doo dad.

Yes, I am officially losing it and no I have not been drinking egg nog.

Mistletoe Kisses,
Madge

Have Yourself a Twilight Little Christmas-Bella and Edward Silhouette

Twilight Inspired Silhouette Pendant Copyright Margot Potter

I am pausing for a moment from the Retrofabulosity to re-share a holiday project from a couple of years back that is perfectly suited to this holiday season. With the new Twilight film coming out, this could be a perfect gift for a Twilight fan on your gift list. The image was made from a real silhouette of Edward and Bella.  You can opt to make this as an ornament, or size it smaller to make a pendant.

The silhouette is ready for download on the old post along with detailed step by step instructions. Enjoy!

Cheers,
Madge

Andy Warhol Ornapendants

Andy Warhol Ornapendants!

I'm usually pumping out Christmas crafts like a madwoman this time of year, but alas my new job has me so busy there hasn't been much time. Instead I'm going to share some projects from years past that I think are still pretty dang craftacular, if you ask me, which you didn't, but I'm just sayin'...

I think these Andy Warhol Ornapendants are one of my favorite projects ever. You can either wear these around your neck or hang them on your tree. Whatever floats your proverbial boat, my fine friend!

Rock on,
Madge


A Retrofabulous Christmas Crafabration with Madge!

Holiday Fun with the Potters 2008!

(Congrats to Pippirose for winning the prize package!)

I am not afraid to admit that I love Christmas....so there! Take that, holly haters! I love it because it is for those of us who miss the light this time of year, a way to bring the light inside of our homes, deck our halls, celebrate the joy of giving, sharing, laughing and loving. It's a magical time, if we allow it to be. It is like all things in life all about perspective. It isn't about the race for the cheapest DVD Player or the newest gadgets or games, it's about family and friends. Honestly I've been chomping at the bit here this year. I'm so excited and I just can't hide it! Bring on the glitter, break out the glue guns, tinsel me up, baby!

I had a few not so fabulous Christmas experiences way back when and for many years it tainted things for me. I felt the holidays approaching and immediately started feeling stressed out and sad and disappointed in advance. We put a lot of pressure on these few days to make us happy. It's rather silly really. Happiness isn't an involuntary response to external stimuli, happiness is a conscious choice.

I dreaded Christmas for years and then I had a kid and she reminded me that it was about being in the moment so fully and completely that we couldn't help but choose joy...and that we could be sad too, but we didn't have to get stuck there. She helped me rediscover the wonder of the season. She helped me rediscover the magic of believing. She showed me the Zen of Christmas.

I choose not to get caught up in the buying of crap that people don't need. I choose not to feel pressured. I choose not to be sad about the disappointments of Christmas past. I choose to focus on the joy. The best gifts don't come in packages, they come from the heart.


I have recently acquired 16 sensational 1960s craft magazines. I am going to share with you over the next few weeks my version of some of the projects and remind you that a handmade gift can be ten times cooler than some random obligatory thing picked up on sale at the mall. It's a Retrofabulous Christmas Craftabration with Madge! Game on!

xoxo
Madge