Showing posts with label free teen craft project. Show all posts

ILoveToCreate Pink Splash 3-D Flower Bangle


ILovetoCreate Teen Crafts Pink Splash 3-D Flower Bangle
Copyright Margot Potter
“Mom crafted, kid approved.”

I designed a chain and bead necklace a couple of years ago featuring a similar hot pink die cut flower on it for a class proposal. At the time, this kind of look hadn’t hit mainstream fashion hard and I think it was just a skootch ahead of the curve. Flash forward to 2010 and dimensional floral accents are EVERYWHERE! I’ve re-imagined it attached to this pretty painted pink bangle design using fabric paints, fabric markers and Aleene’s Liquid Fusion glue. I think this is one of those perfect ‘Back-to-School’ accessories for the teen fashionista. It’s flirty and fun and girly and right in step with what’s happening in the fashion mags.

PLUS the flower spins around like a pinwheel, so it’s a kinetic design too! When those crystals get spinning, it’s really quite mesmerizing!

This requires using an electric drill, so a little assistance from mom or dad may be required. You could opt to do smaller flowers and have them circle the wrist, but I’m a big and bold kinda gal and so is Miss Avalon, my resident teen. Take this idea where you like, express your individuality! That’s what crafting and fashion is all about.

Materials
Grungeboard sheet swirls pattern
Tulip Soft Fabric Paint in azalea
Tulip Metallic Dimensional Fabric Paint in white
Tulip Metallic Dimensional Fabric Paint in metallic silver

DIY Bangles small wooden bangle
Inkadinkado lourish stamp
Aleene’s Liquid Fusion glue
Tulip Glam-It-Up™ crystals
Crystal bead for center
Pink or silver-plated head pin
Sizzix Bigz Flower Die

Tools
Tulip Glam-It-up™ tool
Sizzix Big Shot machine
Electric drill with 1/16” bit
Paintbrush
Foam brush or foam applicator
Flush cutters
Round nose pliers


1. Paint several layers of azalea paint on inside and outside of bangle. Allow to dry between layers.

2. Stamp flat oval areas with flourish stamp and white paint. Apply paint with a foam applicator or brush to surface of stamp. Allow to dry.

3. Mark center of one flat oval segment on bangle and drill.

4. Die cut flower out of Grungeboard using the Big Shot and the Bigz flower die.

5. Paint both sides of each layer of flower with azalea paint. Allow to dry.


6. Use foam applicator and flourish stamp to apply metallic silver paint to surface of flower layers. Allow to dry.

7. Use a thin paintbrush or your foam applicator to edge the flowers with the metallic paint. Allow to dry.

8. Glue flower layers together with Liquid Fusion. Allow glue to dry.

9. Use Tulip Glam-it-Up crystals and wand to apply crystals to edges of flower petals.

10. Thread head pin with flat side facing inside of bracelet through drilled hole, hole in center of flower and a crystal bead. Use round nose pliers to turn a loop and secure. (If the head pin head is too small, use a small button to secure it to the back of the bracelet.)

It's My One Year ILoveToCreate Teen Crafts Blogiversary!


Advertisement Copyright ILoveToCreate

As many of you know, this has been a crazy summer around Casa de Potter. Imagine my chagrin when I realized yesterday afternoon that I missed my one year Blogiversary with ILoveToCreate! It was July 16th last year when I posted my first teen craft project. Not to throw out a tired and overused cliche...okay I'm actually going to do that very thing...but time really flies!

Every week, my challenge is to come up with a project that is teen friendly and teen achievable. If it's too complicated or two 'grown up', it's not going to pass muster. Heck even saying pass muster isn't going to fly, teens have no clue what that means, and quite frankly neither do I. Let me search that...okay here! Trends are shifting constantly and I try my best to keep up with them. Silly Bandz were in and out of our schools here in literally one month. Who can keep up with that pace?! I try to combine a little retro sizzle with a modern twist, which is I suppose the trajectory of most of my work.

Luckily I have a fashion savvy teen here who advises me on the cool (or not too cool) factor of my ideas and contributes her own amazing projects to the mix when I need a helping hand. Ya gotta love that!

I've compiled a small smattering of my personal favorite projects here with links to the instructions for your edification, entertainment and enjoyment. If you go to this RSS feed, you can find all of my projects from the past year! These sometimes get lost in the shuffle of older posts and it's fun to take them out for another spin. I hope you enjoy and I look forward with breathless anticipation to sharing more Teen friendly craft ideas featuring the fabulous products for ILoveToCreate in the coming year.

Love
Madge

Madge's Top Eleven (I know, it's not ten, I like too many of them!) Favorite Teen Craft Projects from 2010...in no particular order!

CLICK ON IMAGES FOR INSTRUCTIONS!

Crafty Rock Star Necklace

Upcycled Denim Book Cover

As Time Goes By Necklace

La Tour d'Eiffel Tower Lamp

Mod Girl Chipboard Necklace

Pretty in Pink T-Shirt

Moulin Rouge Tiny Top Hat Headband

Snow Day Christmas Canvas

Halloween Hootenanny Invitation

Pretty in Peeps Necklace

Avalon's Awesome Sweet Dreams Throw Pillow

ILoveToCreate Teen Crafts: Totally 80s Pollack Inspired Tote Bag


ILoveToCreate Teen Crafts
How To Make a:
Totally 80s Pollack Inspired DIY Tote Bag

Margot Potter The Impatient Crafter™
“Mom crafted, kid approved.”

Sometimes you make crafty gold and sometimes you make...this purse, but whatever you do, own it fully and more importantly, enjoy the journey. By the end of several hours of earnest crafting, I was convinced I was staring at a full on craft fail. Then the buzzer sounded and I was staring at this tote bag, thinking...really, Madge? Is this your teen craft project for this week?!

All in all, this just might be a bit of a hot mess, but Avalon came home from school and absolutely loved it. Who knew?! I have to remind myself sometimes that my focus here is 'teen crafts', which means the projects can be quirky! This has definitely got a modern art meets the 80s appeal. It’s fun to let all propriety go and squeeze paint with abandon on a canvas. I can see why Jackson Pollack enjoyed it so much. In this case, the canvas is a tote bag and the paint is Tulip dimensional fabric paint. It’s the perfect medium for this kind of design because it won’t run and stays dimensional after it dries. After layering on paints, I carved out some floral shapes with the tip of a paint tube and embellished them with metal chain and the foil side of some old faux gemstones. Aleene’s glues make it easy to stick just about anything to just about anything else! The floral trim is from Prym-Dritz, I gave it an edge using a Tulip Fashion Graffiti Big Phat marker.

I think other teens will dig this too. (Yeah, I said dig it.) Send them outside with some canvas totes, markers, stencils, trim, adhesives and a bin full of fabric paints and sprays and let them make some glorious messes of their own!


Materials

Fuchsia Canvas Purse
Raveled Rosettes Fabric Trim
Tulip Fashion Graffiti Big Phat Marker
Tulip
Dimensional Fabric Paint Metallic Silver, Matte Black, Slick Fuchsia
Ranger Alcohol Ink Mixative Silver
Aleene’s Liquid Fusion Glue
Aleene's Jewel-it Glue
Flat back silver faux gems or the foil side of old faux gems

Tools
Scissors
2 pairs chain nose pliers


1. Layer Dimensional Fabric Paints on canvas by squeezing the tubes about 8 inches from canvas and moving the paint stream into circles and lines and squiggles. Keep making layers until you’re pleased with the results.


2. Use the tip of one of your paints to carve floral swirls out randomly.

3. Squeeze and shake silver mixative over paint layers randomly. Squeeze into the center of your carved floral areas (a little goes a long way.) Allow the paints to dry.


4. Use the marker to darken the frayed edges of the flower trim.


5. When the paints have dried, use Aleene’s Jewel-it to add gems to center of carved flowers.

6. Place chain around flower to determine length needed. Remove segment from core chain using pliers. Add a line of glue around flower and glue down chain. Repeat for each flower.

7. Glue the flower trim across the top of the purse using Liquid Fusion Glue. Allow to embellishments to dry.

ILoveToCreate Teen Crafts: Techno Garden Cell Phone Holder


ILoveToCreate Teen Crafts
Techno Garden Cell Phone Holder
Margot Potter
“Mom crafted, kid approved.”


Avalon is finally not the “only kid” in her school that doesn’t have a cell phone. Lest you think us barbarians, we simply couldn’t see the point of paying for another line for a twelve year old. I think kids are too plugged in as it is. Little did we realize, due to a miscommunication with our cell phone carrier, we’ve been paying for a third line that we don’t use for a year now. Argh. So we gave Avalon a second hand cell phone and instructed her to only use it for emergencies. We’ll see how long that lasts...

She immediately started rummaging through my crafty coffers for my collection of hand crafted cell phone holders. I’ve been making these for the past few years for books and magazines. I love the irony of a kitschy retro craft being converted into a techno friendly item. Thusly this project was born.

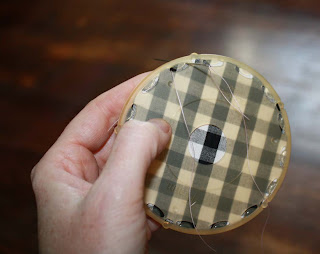
Add the awesome fabric YoYo maker I scored last month at the craft store that I’ve been itching to use in a project, an upcycled gingham shirt with buttons that didn’t fit properly and some vintage plastic beads and...I present the Techno Garden Cell Phone holder. In case you didn’t hear, gingham is all the rage for spring and summer fashions this year. You will have to create a pouch that fits your specific phone, therefore I’ve not included dimensions here. Just measure the felt around your phone, making sure there’s room for the phone to slide inside. Cut, glue and decorate.


Materials

Craft felt sheet in red
Black and white gingham fabric (if you have an old shirt you want to use, feel free)
Three coordinating buttons (mine came directly from the shirt)
Pine green rick rack trim (mine was vintage, but this stuff is easy to find)
Snap set
Aleene’s Liquid Fusion Glue
Aleene’s Super Thick Tacky Glue
9 10mm yellow Beadin' Path vintage plastic beads
10 8mm green AB Czech glass beads
2 EZ-Crimp ends
.018 49 strand beading wire
White or light color thread
Red thread

Tools
Clover YoYo Maker Large

Chasing hammer
Snap setter
Steel block
Mighty Crimp Tool
Chain nose pliers
Wire cutters
Scissors
Needle

1. Create beaded strand by attaching wire to EZ Crimp using Mighty Crimp Tool. Add your beads beginning and ending with a green glass bead and alternating between the two colors. Use chain nose pliers to pull wire through EZ Crimp end, keeping wire rounded to prevent from being too stiff, use Mighty Crimp Tool to attach wire and cut off excess with wire cutters.

2. Measure and cut your pouch leaving a 1” edge for your flap.

3. Glue the sides together up to the bottom of the edge using Aleene’s Super Thick Tacky Glue. Allow to dry overnight.


4. Create Yo-Yo following instructions on Clover YoYo Maker package. Begin by inserting fabric into receptive end of tool and then snapping the cover into place to secure the fabric.


5. Use fabric scissors to cut fabric edge to approximately ¼”.


6. Keep edge folded as you sew around the template from the bottom of the tool. See photo.

7. When you reach your final hole, sew through the first hole again. Carefully remove the snapping component from the receptive component and remove fabric.


8. Gently pull thread end tucking fabric edge into the center as you create your YoYo. When you have it formed, sew the open thread into the fabric edge, knot and cut off and tuck excess thread. Create two yoyos.

9. Mark and cut rick rack trim to create flower stems. Fold a bit of trim to form leaf. You can tack this with thread if you like.


10. Glue the components to the front of the pouch starting with the leaf, the stems and the flowers with Aleeene’s Fast Tack Tacky Glue. Allow to dry overnight.

11. Use Aleene’s Liquid Fusion to attach buttons to front of flowers. Allow to dry.


12. Attach snap following directions on snap packaging. You can also opt to use Velcro tape here, but tack it down for strength. My snaps use a small tool and a hammer to attach to the felt. After attaching snaps, glue a button on top of the exposed snap back on the front of your pouch using Liquid Fusion glue. Allow to dry.

13. Use red thread to sew the EZ Crimp ends on the strap to the back of the pouch. I positioned my strap ends just inside of the glue line on the edges of pouch. Tie off thread and hit with a tiny dab of glue. Repeat for second strap end.

iLovetoCreate Teen Crafty Rockstar Necklace


Teen Crafty Rockstar Necklace copyright Margot Potter for iLoveToCreate

iLoveToCreate Teen Crafty Rockstar Necklace
by Margot Potter

"Mom Crafted, Teen Approved."

Fall is upon us and winter isn’t far behind. I was thinking about fall friendly jewelry for teens and this idea popped into my head. I love the unexpected addition of soft blue with the traditional fall colors. You could easily make this same idea in other color palettes, but I really liked these earthy tones. My daughter Avalon thought this was super cool, and I trust her sense of teen style implicitly. And just for the record, I’d sport this myself in a hot second...in fact I may just sport it today!

Think about this for Christmas with holiday themed charms and papers...

...I’m just sayin’!

Materials
Traci Bautista’s Collage Pauge Glossy
Aleene’s Liquid Fusion Glue

Crafty Chica Little Paint Pack Paints Red and Yellow3 Tim Holtz Acrylic Fragments charmsDie Cuts With a View The Rockstar Stack
8 frosted orange Lucite leaves (The Beadin' Path)
5 frosted green Lucite leaves (The Beadin' Path)
8 8mm olive green moonglow vintage Lucite rounds (The Beadin' Path)
2 frosted orange Lucite flowers (The Beadin' Path)
6 6mm cracked blue Czech glass rounds
Silver plated rolo chain
Silver plated swivel lobster
13 silver plated head pins
3 10mm silver plated jump rings
21 6mm silver plated jump rings
Flourish stamp

Tools2 pairs chain nose pliers
Round nose pliers
Wire cutters
Foam brush
Paint brush
Pen or pencil for tracing shapes


Place pendent over segment of paper you desire and trace. Repeat for all three pendants.
Cut out papers. Spread a thin layer of Collage Pauge on pendants and adhere paper. Gently press on the back to remove any air bubbles. Paint collage pauge on back of tile. Allow this to dry for several hours.

Mix a small amount of red and a much larger amount of yellow Crafty Chica paints to create a warm pumpkin orange. Stamp into paint and stamp flourish on edges of your pendants. Allow to dry.


Attach an orange flower and a blue bead on to the top left corner of the largest pendant using Liquid Fusion. Allow to dry.

Create coil topped dangles for your blue and green round beads. Thread a blue bead, a flower and a green leaf on a head pin, then coil the back and bend it flush to the back of the leaf to create a small pendant for the back of your chain. (See this video for a quick and easy head pin coiling how to!)


Attach the largest pendant to the center of an 18” length of rolo chain using a 10mm jump ring. Move over 4 links and begin to attach elements on every other link using 6mm jump rings for beads and leaves and 10mm jump rings for the pendants, make sure they’re all falling to the bottom of your chain. The pattern on both sides is: orange leaf, green bead, green leaf with blue bead, green bead, orange leaf, pendant and the same pattern established in the first section of beads and leaves. (For a quick and easy tutorial on opening and closing jump rings see this video how to!)

Attach a lobster clasp to one end of your chain using a 6mm jump ring. Attach the flower pendant you created to the opposite end using a 6mm jump ring.

(Most of the products used in this design were donated for promotional purposes with the exception of the scrapbook paper and the rubber stamp.)

Free Halloween Craft Project for iLoveToCreate: Halloween Hootenanny Invitation

Free Halloween Craft Project
Halloween Hootenanny Party Invitation
Margot Potter for iLoveToCreate Teens


If your teen isn’t into the spookier side of Halloween, here’s a super cute retro party invitation they’ll love! Stack up layers of vintage and new paper and add a printed invitation and you’re good to go! These are and fun to throw together, so making a whole bunch won’t be a problem. If you’re into upcycling his is a great way to use up your scrap paper!

MaterialsKing & Queen Font 14pt. (daFont.com)
White computer paper
Old book pages
Bright orange cardstock
Acid green cardstock
Black and silver patterned scrapbook paper
Sizzix Hello Kitty Bigz Daisies die
Aleene’s Tacky Glue Stick
Aleene’s Fast Grab Tacky Glue
ToolsWord processing software
Bone folder
Scissors
Paper cutter
Sizzix Big Shot
Fiskars 1.5” circle squeeze punch
Fiskars 1.5" scalloped circle squeeze punch
Fiskars 1/4” diameter circle hand punch
Round standard size dinner plate

1. Type out the following in 14pt. into a Word document. Center the title and left margin the info: It’s a Halloween Hootenanny!
Time:
Date:
Location:
RSVP:

2. Print and allow ink to dry. Cut into 4”x4” square using a paper cutter.

3. Cut a 12”x6” sheet of acid green cardstock on your paper cutter.

4. Find and mark the center point of the width of the paper. Use a bone folder to fold and crease paper so the ends meet in the center.

5. Starting at the top corner of the folded paper, center and angle a ruler to mark the tufts. This angle should be 1.5” in length. Use a dinner plate to mark a rounded space between the tufts; this is the top of the owl’s head. Cut out tufts and top of owl head.

6. Mark the bottom of the folded paper edge to edge using the plate. Cut out bottom of owl head.

7. Use Sizzix Big Shot to cut large Hello Kitty flower with vintage book paper. Use same die to cut black patterned paper into a smaller flower.

8. Cut a small dot using a hole punch with a ¾” diameter.

9. Use Fiskars punch to cut out a 1/5” circle in the orange cardstock.

10. Use glue stick to stack and layer papers, starting with the old book flower, the orange circle, the black patterned flower and the green dot. Glue flowers to the cardstock base.

11. Hand cut a 7/8”x5/8” owl beak, this is shaped like a guitar pick!

12. Adhere half of the beak to one side of the slit in the paper using Aleene’s Fast Grab Tacky glue.

13. Adhere your pre-cut invitation into the center of the inside of your card.

14. Cut a triangle shaped segment of patterned paper (this will fit between the eyes at the top of your card.)

15. Trace the back of the top of the triangle so it fits the rounded head of the owl. Cut out.


16. Make a cut the triangle in half starting at the center point so it fits on each side of the card split. Adhere to card with Tacky Glue so the points meet up.

(Blogger's Note: The Aleene's glues, Fiskars punches, Big Shot machine and Big Shot Bigz Dies were donated for use in my design work, all other materials were purchased.)